Since becoming acquainted with Open Source Visual Studio Code, since then Santekno has been working on a project or in other words ‘coding’ using the Visual Studio Code (VSCode) IDE. Besides being light when used, there are also many additional features (plugins) that can support us in coding.
So, Santekno now wants to provide information about how to develop the Go language (Golang) using Visual Studio Code. Apart from that, we must be able to prepare several environmental requirements so that when we code, it is easier and more comfortable.
Usually for programmers, the more features that can make it easier, the faster we can do a job, such as shortcuts that can make it easier to work faster just by pressing a button on the keyboard, to the autocomplete feature (plugin) if we type the code. it is related to what we want to implement.
Installation of Extensions (Plugins)
Here are the ways we can set up the Visual Studio Code to make it easier to work on:
- Make sure Go is installed on your laptop
- Make sure Go Binary is available in the PATH and the GOPATH variable is adjusted
- Also make sure the laptop is connected to the Internet because we will install the plugin directly from the Internet
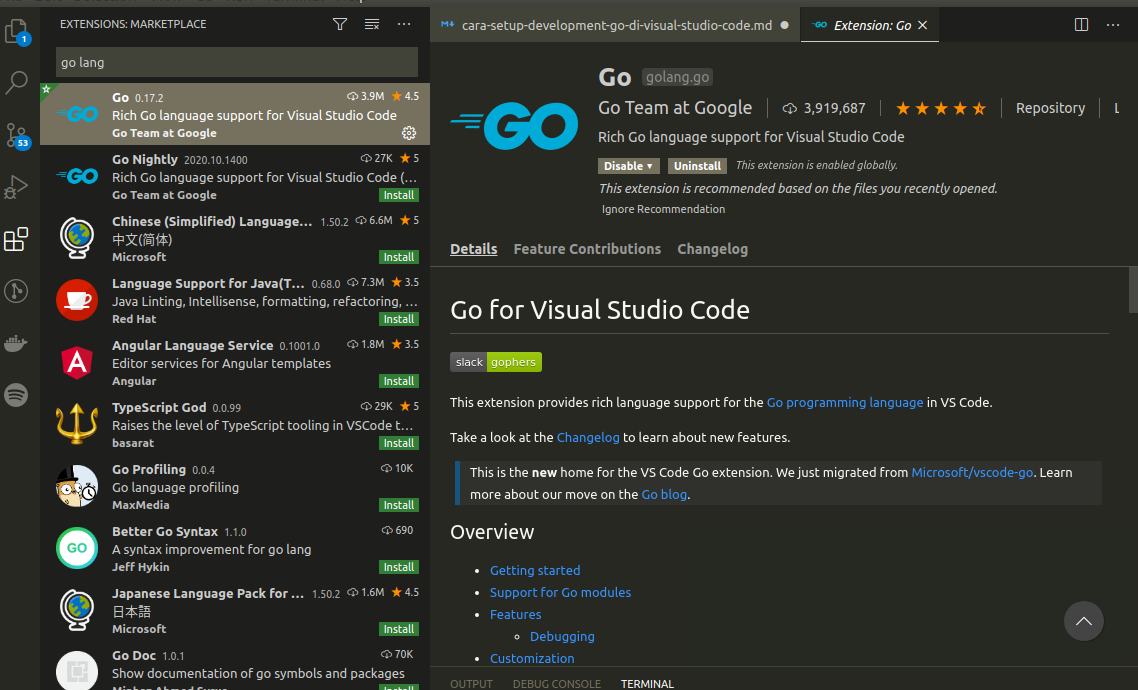
- Use (Ctrl + Shift + x) to display Extension options
- Type “Go Lang” in the search field and then a list will appear, select *Go Extension"

- Select the top one and press “install”
- After that, it usually suggests “reloading” and the extension will automatically activate immediately.
Preference Go Development
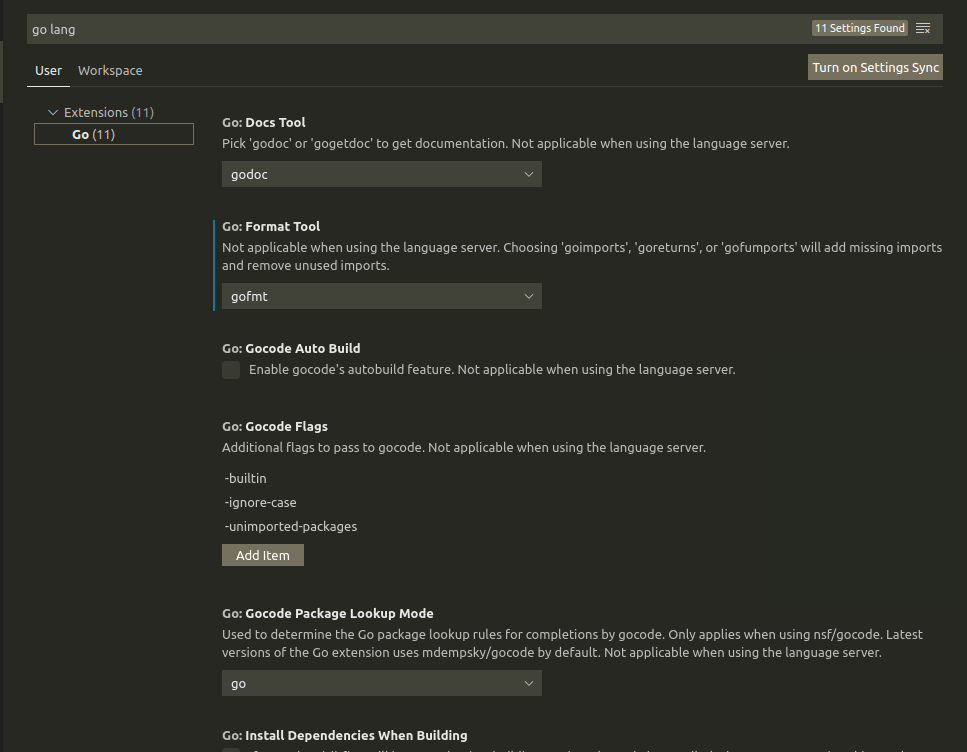
If you want to change any preferences Go Tools will be called by Visual Studio, you just select Preferences from the main menu. This will bring up the settings in the editor and you can configure Go as shown below:

Here you can make several settings, starting from Auto Save, font size, tabbing, exclude, color decoration and many more.
Ready to code in Visual Studio Code
Now let’s validate our Visual Studio Code editor.
Assuming that you have launched Visual Studio Code, the first step is to add the Project folder. Assuming that you have GOPATH set up for Go Projects, you can select the folder where you will save the project files. You can take an existing project, but I recommend you create a new folder in your source folder.
In Visual Studio Editor, go to File → Open… You can select the folder that points to the root of your application.
Create a new file called main.go. You can do this by clicking on the new file icon as shown below:
package main

import "fmt"

func main() {
    fmt.Println("Hello World)
}
When saving a file it will be checked for compile time and some other things like adding import automatically or removing it if you don’t use it. That will make our program code quite neat.
You may see some packages or tools that Visual Studio will ask you to install. So just install it so it can support your needs when coding. Suppose if you make some basic mistakes in a Go file and you save the file.

Then you will see an error as shown above.
How to run Go
Now let’s see how to run a Go application from within the Visual Studio Code editor itself via the Integrated Command Line (Terminal). Now you can launch Terminal at any time via the key combination Ctrl + j.

You can also activate it with this combination. Now you can use standard Go commands to run your application. Suppose run as shown above.
Perform Debugger Integration
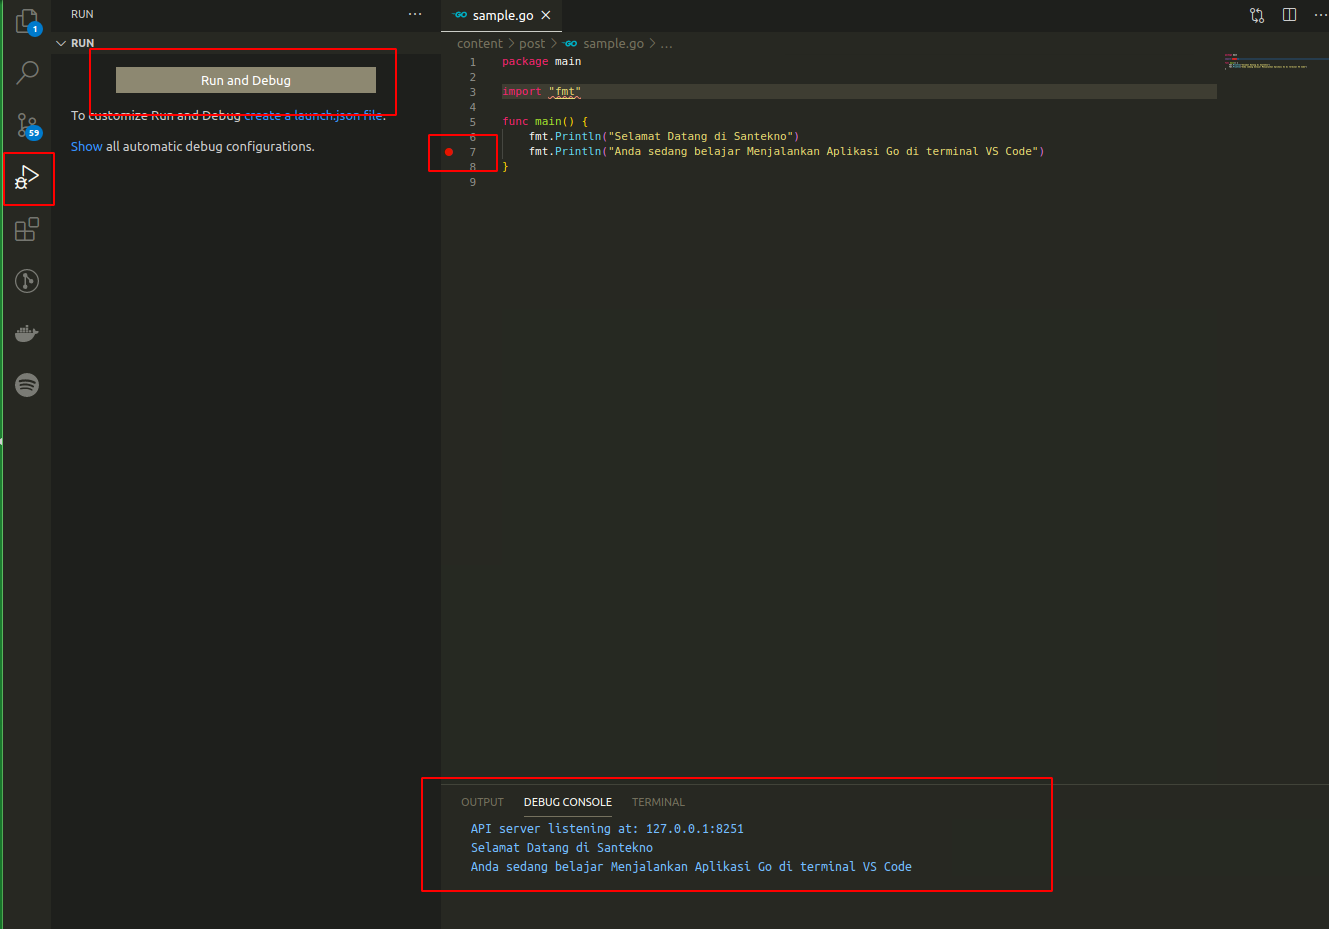
Another interesting thing is Debugger Integration in Visual Studio Code. Go ahead and install delve first. Once you have those settings, you simply select the icon to the left of the tab and click on Run and Debug, pressing the cursor before the line number you want to place the breakpoint on.

Next the process stops at the line where you placed the breakpoint, you can check the stack, observe a variable or two and even check the current value of the variable.
Hot Articles
12 Creating Static File Handler
01 Jan 2025

